
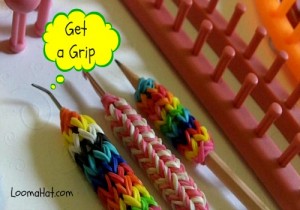
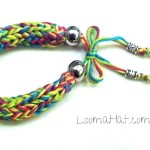
How to Make a Grip for Your Hook
 Learn how to make a grip for your hook, pencil or straight tool using any size long knitting loom. two round looms attached or even a bracelet loom. Easy to follow text, picture and video tutorial.
The grip is especially great for knitters with carpal tunnel, arthritis or those that simply prefer a thicker handle. I wasn’t sure about adding volume to my small Knifty Knitter hook but after several months of knitting with my chubby hook I have to admit that I love the look and feel. Plus now I can make it what ever color I want or how many colors I want. It isn’t purple anymore. Even more important it was a fun project that I really enjoyed doing. Too Cool!
This is Beginner EASY. I would say that a child as young as 6 or 8 years old can handle the work with very little supervision because the steps are few and constant.
SCROLL TO THE BOTTOM OF THE PAGE FOR A VIDEO
.
Supplies Needed : Loom, Rubber Bands, Hook
Loom or Looms:
LONG: I used a long loom. (BTY – I got this loom as part of a Set of 4 which includes the flower loom for just $10.00 on Amazon – AWESOME Deal : Click Here)
ROUND If you plan to use a round loom, well you will actually need two. To connect them so that they work like a long loom take 4 rubber bands. Connect the first two pegs (top and bottom) and the last two pegs. Note that you will using 6 pegs in total, 3 on top and 3 on bottom to form a square.
SPOOL: If you have a Spool Loom – use the large end
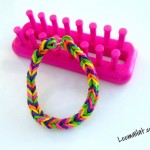
BRACELET: You can also use the Rainbow Loom or any rubber band bracelet loom that is similar .
Rubber Bands:
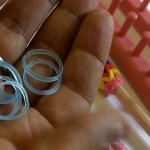
I used the Rainbow Loom rubber bands. The tend to stretch better. In the past I have used the rubber bands for braids but they tend to not be as flexible. But use what ever you have on hand – if only for a test drive.
For a full grip on my Knifty Knitter I used 74 rubber bands.
Hook:
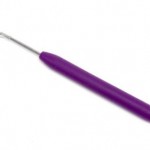 It’s best but not necessary to have two hooks. I used the Knifty Knitter and a regular crochet hook.
I only recommend two because I am assuming that you are going to cover the one you are knitting with since you’re here to learn how to make a grip for your hook.
Picture Tutorial
Instructions : How to Make a Grip for Your Hook
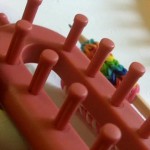
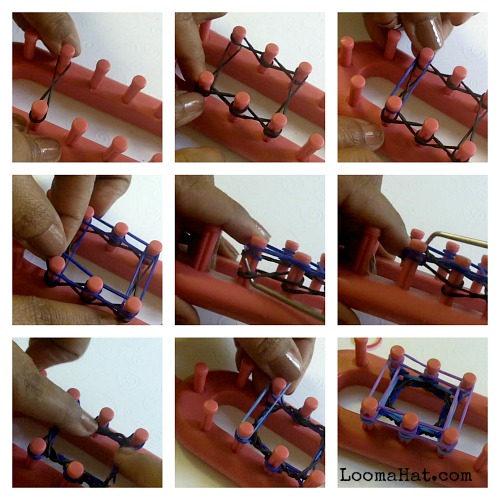
1. Place your rubber bands on your loom. For the first row make figures 8 with each band forming a square with the six pegs of your loom.
2. For the second row – place them straight across to form a square.
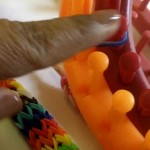
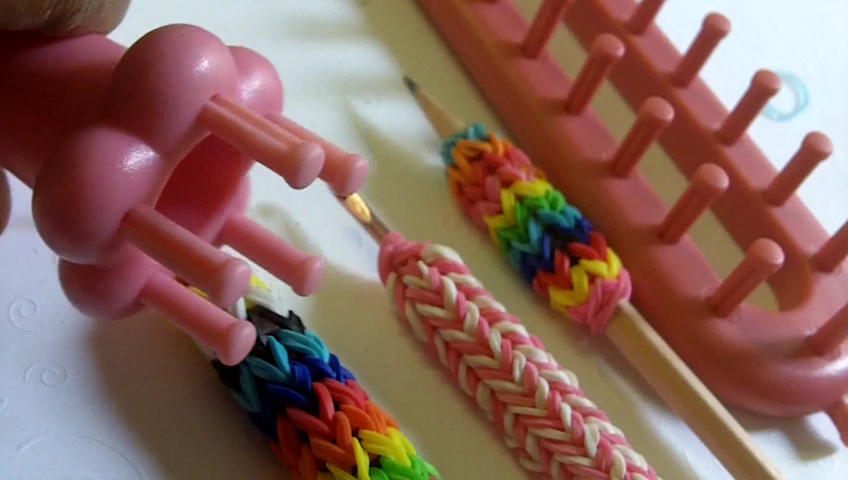
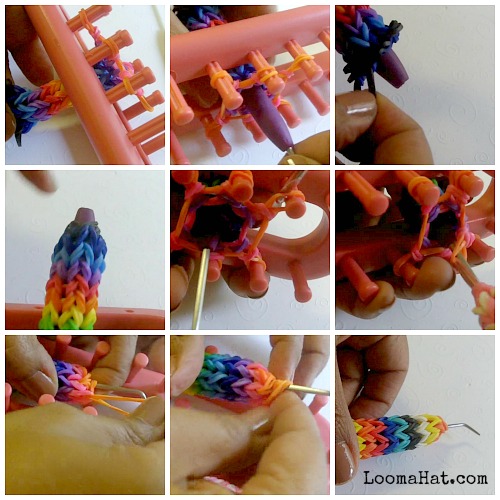
3. When you have the length you want put the hook the middle opening. Push it down and take the bottom loops and wrap them around the bottom of your tool.
4. Do the same for the top
Video Tutorial
Video: How to Make a Grip for Your Hook
I always recommend that you watch the video in its entirety before starting the project. You will feel more confident through out each step if you already know what to expect.
If you enjoy the video PLEASE give it a thumbs up (LIKE) and subscribe to the channel. Both things help me a lot so that I can continue making more videos. If you don’t like it please be gracious with your comments.
I hope you learned how to make a grip for your hook or pencil with a knitting loom. As always leave me your comments and questions in the comment section below. Thank for visiting and come back to Loom with Me !
.

Tagged: Grip, kids, pencil grip, rainbow loom, rubber bands


I made one for me and my daughter. On mine, I did double the bands for more comfort because of arthritis. But we love them !!!
Awesome ! Glad you both love the project – its one of my favorites – and what a GREAT idea to double the bands 🙂
I made my grip just now. Its teal and white. As FYI i did not see need to expose metal it looked better without expisining. If someone does i did notice the hook needs to be pushed down to get metal to show. What I notice is once that metal is exposed on a hook bottom the top of tool moves and does not stay as stable on cheaper hook. My purple kniffy knitter was my choice of hook as Martha Stewarts hook resembles that similar rubber grip, but hook is very cheap and bends. So out of three hooks my kniffy knitter no metal exposed is by far best and stable. I just wanted to share my trials and product reviews of my own free will. Thank you for fun project. I love to attach picture but not sure how.
Hi Gina, thank you so much for your information – GREATLY appreciated. As for your picture – you can email it to me and I will attach it to the page. denise@loomahat.com
Ok let me kniw when to look at posting.
Love this idea for little people and students????
Love it!! Can make it so pretty!!
Awwwww Darn. I was all excited to make these until I found out you used the rainbow loom bands. I am allergic to the cheap latex they are made of…
Any brand of small rubber bands for braiding will work
I found that if your grip slips around on the hook, putting a few extra bands wrapped around the handle underneath the grip helps to hold the grip in place.
Thank you very much for the video. This is brilliant.
Thank you for such a clever idea and I notice that my hand and back is so much more relaxed when I crochet with mine now. I made a small change and used 2 bands instead of one and the end result is a much more cushioned grip. Thank you again,
Hey – that’s a great idea – Thanks !
I wish I could make these but I am allergic to the rainbow rubber bands. :'( Any ideas for someone like me…
Are you allergic to latex? If you can pin-point the source of the allergy you can just find a brand of Braiding rubber bands that doesn’t have it.
I agree with what everyone else has said: you’re great at explaining things so I can understand them, so your videos are very helpful, thank you so much!!!
Thanks, I have wondered how you made that from watching your videos, now I know! I love your videos, you are a wonderful teacher!
Thank you Peggy !
I can’t wait to get my rubber bands and try this!
I can say that I use this EVERYDAY. One of my favorite and most useful projects ever !
Thank you for this video my hook hurts my hand so this will help so so much! Keep sharing your videos! Love them ALL!
Thank you K !
where do i buy the elastic bands
Crafts stores, amazon, ebay – check the links on the post
I have been trying to find a pattern for spool knitting a braid on a hat that I spool knitted
I don’t know of any pattern for a braid on a spool loom….Sorry
Hi Denise,
I came here from the YouTube slipper video I viewed and liked the grip you made for your hook. I was thinking of putting mold making material on my hook to make the grip softer, but now I will try the rubber bands. Will pick some up tonight.
Thank you for taking the time to share your craft and tips!!!
Monica, THANK YOU for taking the time the say Thank you ! 🙂
This is a great video. It is so easy to follow with the directions you give make it easy to make these great covers. These are great to help with easing the repetitive movements of the hands when looming and crocheting. The hooks being wider make it possible to enjoy doing the crafting longer. Thank you for this an all your videos. I love looming and your website is the first place I come if I have a question on a stitch or I am looking for a pattern. Thank you for your time and sharing your talent with us loomers.
Thank you for your kind words. VERY much appreciated !
I am new to looming and you are my hero and my mentor!! Your videos are easy to follow, and I love my new grip!!!
Very good video , had no trouble understanding and it was a breeze, thanks so much.
You’re very welcome!
I so love loom knitting but i could not do it without watching your video I love watching and making cute little crafts like this thank you
Thanks for the Thanks Brenda !
Hugs,
denise
That’s awesome! can’t wait to get to the store to get some rubber bands and start making these!
Thank You Renee !
Great project,trying it now
Hi Denise, Is the handle grip transferable to different hooks? Or, do you have to leave it on the one hook once you make it for it? Thanks for your wonderful videos. I have learned so much from you. Happy Looming!
Hi IkLoomer, Yes-the grip can be transferred :). Thanks for asking, I forgot to put that in the video. You just need to have the item that you’re transferring the grip to available when you are ready to remove the grip.
Push the grip to the tip of your tool. Pull the last loops off of your hook one at a time and on to your new tool. Push it into place.
Hope that helps,
denise
I accidentally found you and glad it happened! I know children who can make these bracelets, etc and I was the clueless one! But you solved that with this video. Now to buy the little rubber bands and ease my hands…
Thank you, it was easy and very well explained.
Denise ,
Once again you have taught me that just about anything is possible with looming !! Who knew !! Glad to see that you are back and with all of these new ideas !! Awesome girl !!
Thanks, Thanks & Thanks !!!
Melanie, you have made me Happy, Happy, Happy. 🙂
Thanks,
denise
Brilliant!!!!!! Thank you for not only sharing, but doing the video! Will have to search these little bands out. I’ve used pencil grips for years, but this will be fun to do to on some of my other hooks and tools.
Glad you liked it and will get some use out of the post. I’m ALWAYS happy to hear that SOMEONE is putting my work to work.
denise 🙂
Very nice tutorial. I have watched several of your tutorials. I always come away feeling like I have learned something new. Thank you so much for sharing you knowledge in a very personable way. So glad your bouncing back and beginning to feel better.
Thank you LK ! Your kind words are very much appreciated.
denise
So glad to see you! Thanks for the cool project!
Thank YOU – I’m really glad to be back – Have lots of ideas can’t wait to share them.
denise