
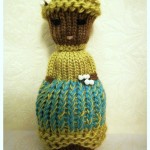
Wholly The Loom Knit Clown Doll
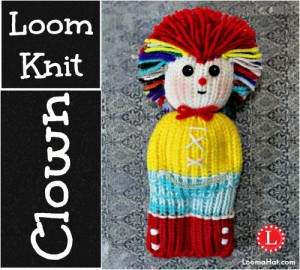
Wholly is my new FREE comfort doll pattern. He is as easy to make as my other comfort doll designs, just one long tube and a little sewing He is a bit different in that he is taller at almost 10 inches and has a wholly head of hair instead of the hat. When I look at him I can’t help but see a little kid trying to act big and cool. I just love this little loom knit clown doll because he is my first. Did I mention I have a teeny tiny fear of clowns? Of course it’s only the mean ones with sharp teeth. LOL
 I’m happy to say that I designed him with some feedback from a few awesome friends here on the website , Facebook and Knitting Paradise. I enjoyed hearing from so many people. It has made this project extra special. I hope you enjoy making your own version of Wholly. By the way, I have to admit that I like him without a face too. You will have to decide what works for you. Upload your cuties to our Facebook Fan page or SEND PICS to my email denise@loomahat.com !
The FREE Pattern on Website – To Purchase PDF
Pattern is FREE on this website. To purchase the downloadable PDF: Click HERE
Pattern: Loom Knit Clown Doll
Supplies:
Loom: Small Round Loom. I used the 24-peg Small Loom
2 Hooks: 1 Loom Hook and a Crochet Hook. I used the Knifty Knitter Loom Hook with a Rubber Grip and a Susan Bates Crochet Hook – also with a Rubber Grip.
2 Needles: Yarn needle and Embroidery needle (or one with a head big enough for the floss to feed through).
Scissors: Any scissors with work. I used a regular and a Fiskars Micro Tip – Helps with the “hair cut”.
Yarn: Scrap yarn is great for this project in 4 – 5 colors including 1 in a flesh tone. I used only #4 worsted weight yarn. You will need about 150 yards in total.
Embroidery Floss: For facial features, eyes and mouth. Black and pink are a good option.
Buttons (Optional): 2 Small black buttons. If you want button eyes.
Glue: Flexible Fabric Glue for the nose
Stuffing: I used Poly-fil and left over yarn and thread scraps.
Paint (Optional) : Acrylic Paint for the Dot on the Eyes
.
Pattern Notes:
* You are knitting from the bottom up. Choose your sequence of colors with this in mind.
* Stitches: U-wrap or Flat Knit Stitch throughout the project. Using a looser version of the Knit Stitch will cause your stuffing to be very visible through the fabric.
.
* The video below will show you how to make a basic comfort doll the number of rows for Wholly are different. You need to follow the pattern below to make the loom knit clown doll.
Pattern:
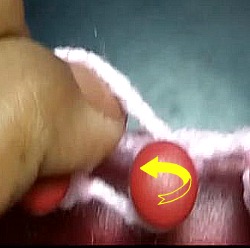
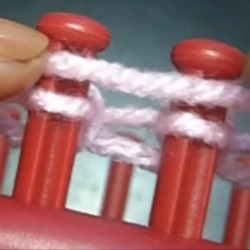
Cast-on: Wrap all the pegs. Using the U-Wrap stitch the a row.
Feet / Shoes
11 Rows of Knit
Pants
Change Color
12 Rows of Knit
Shirt
Change Color
15 Rows of Knit
Face / Head
Change Color – Flesh
21 Rows of Knit
Cast-off: Use the Gathered Method but don’t close the opening completely so that you can fill the doll with stuffing.
Tighten Loose Loops (Optional): The first row of cast-on usually is very loose. For instructions and a video tutorial on how to tighten those loose loops: Click HERE
Time to Sew !
Feet / Shoes: With matching yarn and a yarn needle sew the bottom (feet/shoes) flat. Then sew upward through the middle to create an indentation that makes the bottom look like 2 shoes.Cut the yarn – push the loose fiber into the fabric with your hook or needle.
Legs / Pants: With matching yarn sew up the middle ( minus about 1/2 inch – for the waistline) to define the pants. Cut the yarn – push the loose fiber into the fabric with your hook or needle.
Now Start stuffing and continue stuffing a bit at a time as you move up the project.
Arms / Shirt: Count about 3 rows from the side towards the middle of the chest. With matching yarn start sewing form the waistline up to define the arms. Cut the yarn – push the loose fiber into the fabric with your hook or needle.
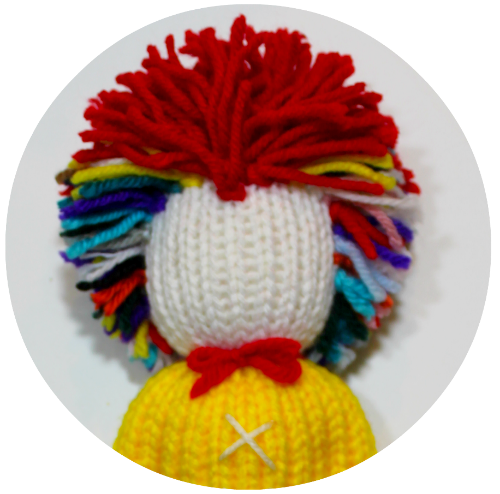
Neck / Head: With matching yarn start feeding your yarn from the center of the neck on the back side of the doll and go completely around the neck. Then pull the strings tightly until you form the head. Cut the yarn – push the loose fiber into the fabric with your hook or needle.
Eyes: You can choose to sew 2 small buttons for eyes or embroider them for smaller children.
Nose: I took left over yarn fibers and rolled them into a ball. Used the fabric glue to keep it together and to stick it to the face.
Mouth: Sewed right under the nose with embroidery floss.
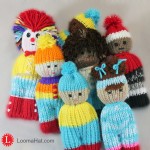
Time to Plug-in the Hair
Mark the hair-line with permanent or invisible markers. Note that you will start plugin-in the hair in front of the marker line so that it won’t be visible.
You add the yarn hair just as if you were putting fringes on a scarf.
Cut strips about 3 1/2 inches
Fold them in half
Take your crochet hook and push it through a stitch.
Pull the loop of your folded yarn strip with the crochet hoot through that stitch.
With your crochet hook wrap the other side of the yarn (look like legs) through the loop to create a knot. Pull tightly.
Your yarn hair is going in a downward direction. To make your hair go upward do the same thing with your doll upside down.
Continue all around the head.
Now Decorate Your Doll to Complete
Video: The Basic Comfort Doll
VERY IMPORTANT: This video was made for the basic Comfort Doll pattern and not for this Loom Knit Clown Doll. The reason it is included is because it will help you with the basic construction and techniques.
YOU MUST FOLLOW THE PATTERN ON THIS PAGE NOT ON THE VIDEO.
As always I suggest watching the video completely before starting the project.
====================================================================

Tagged: 24-peg, clown, comfort, Doll, dolls, duzuza, folk, handmade doll, pocket doll, small loom, softies, toy


These are adorable, I think they’d be great projects to do with my nieces and nephews.
How do you get the rosy cheeks?
You certainly do make the instructions very clear.
Thank you,
Hi Karla, I actually used my own blush on the cheeks. I have some that I have kept for a long time and it still hasn’t come off.
Glad you like them !
I love watching your video’s!!! You make everything to easy to understand! I thank you so much for that!!!
Thank You Bonnie !